If you're serious about still life, product, or natural history photography, you know that the technical skill of the photographer is just as important as the subject itself. That's why I am such a huge fan of the work put out by [Camera Club Live]. Quite simply, he is one of the best in his field, and his entire YouTube collection is an incredible, ever-growing resource for anyone looking to master controlled lighting.In this video, Bubble-infused macro photography [00:00], he maintains his signature approach: clear, concise, and utterly straightforward advice. No filler, just pure, actionable wisdom. If you’re like me and appreciate a presenter who gets straight to the point, he is the benchmark for high-quality instruction.
The Breakdown: From Floating Strawberry to Floating Art
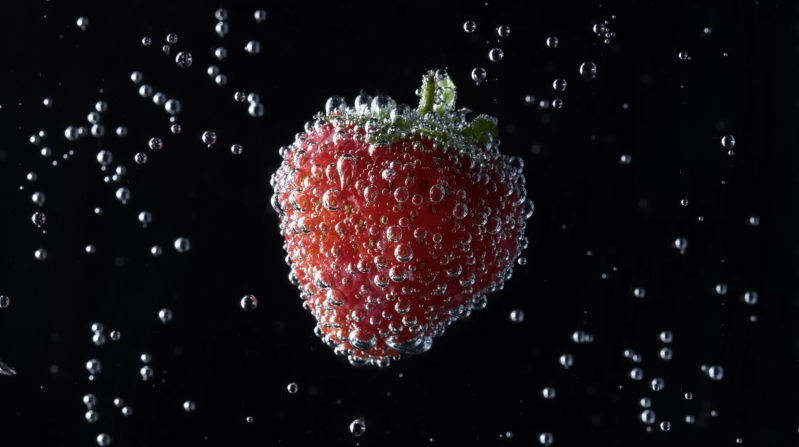
The goal of this video is simple but visually dramatic: to photograph a strawberry suspended in sparkling water, using the resulting bubbles and light interplay to create a visually interesting, high-contrast macro image.
Here are the key takeaways from this essential 12-minute masterclass:
1. The Setup: Solving the Floating Problem
-
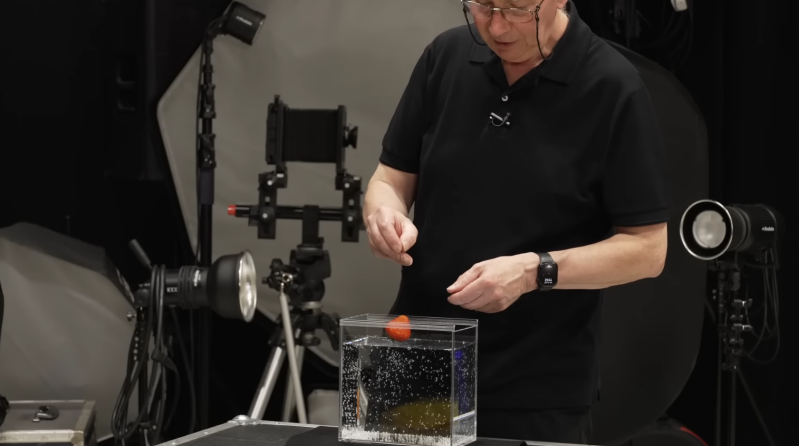
The Container: He starts with a small, 4-litre acrylic fish tank, setting it on wooden blocks to elevate it and covering the base with a black cloth to minimise reflections [00:25].
-
The Environment: Instead of plain water, he uses sparkling water to ensure a constant supply of bubbles that adhere to the subject [01:06].
-
The Rig: The most crucial tip is how to suspend the strawberry. He uses a small piece of welding rod bent into shape to pierce and hold the fruit. The back half of the rod is cleverly painted black to make retouching easier later [01:54].
2. Lighting and Contrast: The Inverse Square Law at Work
This is where his still life expertise shines. To achieve maximum contrast and drama, he explains how to light the setup:
-
Single Side Light: He uses a single studio head (around 250 joules) placed to the side to illuminate the tank and bring out the texture and contrast [03:14].
-
A Black Background, Automatically: He notes that no actual background is needed. Due to the inverse square law, the light falls off so dramatically over the distance that the background behind the tank automatically renders completely black [07:20].
-
Reflector Magic: To give the bubbles bigger, more attractive highlights, he adds simple card reflectors at the front and back of the light source [06:26].
3. The Final Polish: Clearing the Clutter
He gives brilliant, practical advice on managing the composition in real-time. Since bubbles will inevitably stick to the front of the tank, he shows how to use another piece of welding rod to gently scrape the bubbles off the glass right before shooting, ensuring a clean frame [02:40].
Finally, he walks through the necessary post-processing steps in Photoshop, including using the Clone Tool to remove distracting bubbles and applying a specific 16:9 crop for video [09:51].
Final Verdict
This video is a masterclass in turning a deceptively simple concept into a dramatically lit, high-impact photograph. If you want straight-forward advice on lighting control, macro setup, and leveraging simple physics for incredible results, watch this now. He remains one of my absolute favourite YouTube presenters—and after watching this, he’ll be one of yours too.
Add comment
Comments