Welcome back to my studio! For years, my passion has been teaching others to see the world with intention, and nowhere is that intention more critical than in the specialised world of studio macro photography. Today, I want to pull back the curtain on the technical process I use to transform tiny insects into monumental subjects, a process centred around the technique of focus stacking.
The Precision of a Controlled Studio
My aim is capturing the intricate narratives of small insects within the studio environment. Why the studio? Because true detail demands total control, I avoid sitting in a cold field or enduring the whims of the weather. I don't need to travel far at the crack of dawn. Instead, I can enjoy a cup of tea whenever I please and not fret about finding a place to get rid of the tea, if you know what I mean. The key lies in meticulous planning and ensuring that everything remains fresh if it was alive to begin with..
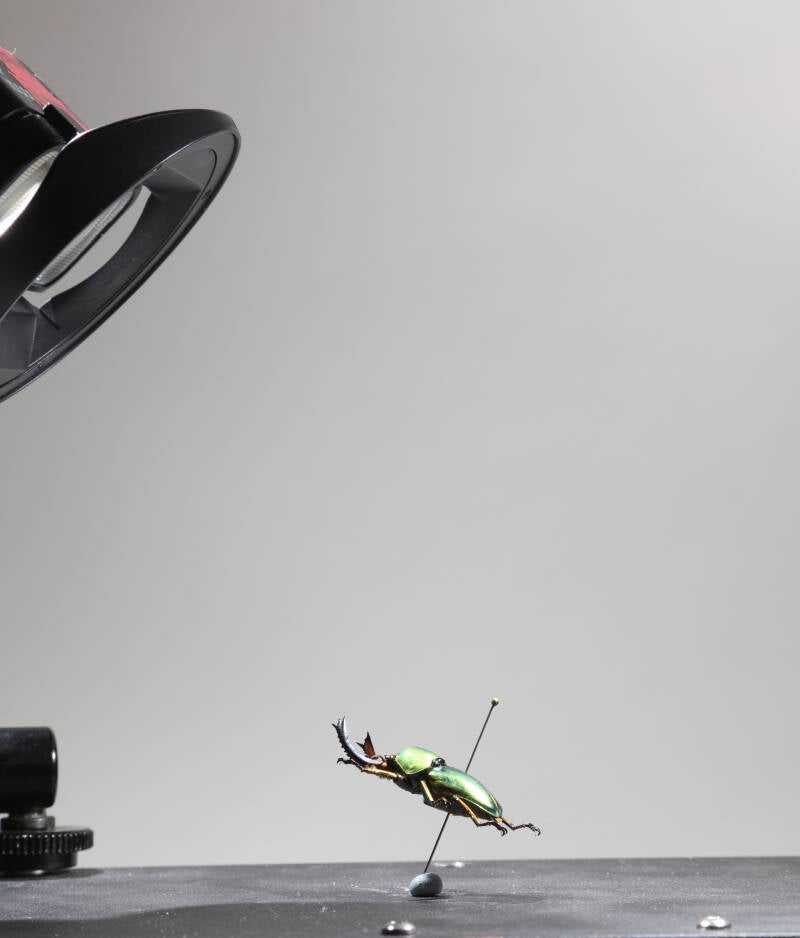
My entire rig is built around achieving microscopic precision. At the heart of it is my focusing rig, which I custom-built from a disused microscope platform. This robust base gives me the precise movements needed to shift the subject a fraction of a millimetre forward, backward, or side to side—essential for flawless stacking. The table is mounted on legs, allowing me to place a flash head beneath the subject for unique illumination when needed.
The Gear for the Finer Detail
At the heart of my setup is the camera, flash, and—most importantly—the lens:
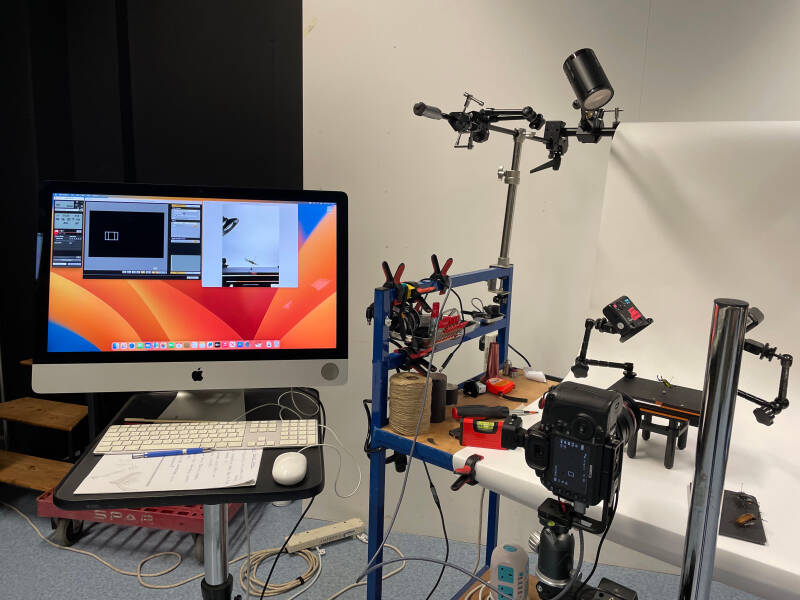
- The Camera: I rely on the Canon EOS 5DSR. This camera is a powerhouse, offering immense resolution that ensures every scale and hair on a specimen is captured. To manage the immense data generated when capturing a stack of images, I typically shoot in JPEG to keep the file size down. When focusing on a single file to highlight detail in one specific area, and not needing to consider extensive depth, I would opt for the raw file to enhance enlargement.
- Tethered Control for Stability: To guarantee the utmost stability and efficiency, I control the camera directly from an Apple Mac computer using the Canon Utility software version 3. This tethered control is critical because it keeps the camera free from movement, eliminating the slightest vibration from touching the camera body. Furthermore, it allows me to preview the fine focus adjustments live and immediately see the image after exposure on a large screen. This level of control is non-negotiable for precision macro work.
- Streamlined Apple Workflow: All of my Apple Mac desktops are synced, which significantly helps with the workflow. I can capture on one Mac and immediately edit from another, streamlining the demanding post-production process required for focus stacking
- The Lenses (Quality Glass): The quality of the glass is non-negotiable for extreme sharpness. I primarily use either the excellent Tamron 90mm macro lens or the classic Canon 100mm macro lens. These lenses are crucial because their superior optical quality ensures maximum resolution is delivered to the sensor, maintaining sharpness and clarity across the entire stack.
- The Illumination (Godox MF12): My preferred light source is the small but mighty Godox MF12 Flash heads. These compact, dedicated macro flashes are invaluable because of their precise control and size. I keep the flash heads fixed to the bed of the focusing table. Crucially, as the table moves forward or backward to capture each slice of the image, the flash heads move with the table. This ensures the illumination remains identical across the entire series, guaranteeing a seamless final image.
Focus Stacking: The Extreme Detail Advantage
Why go through the effort of stacking? The simple answer is depth of field. When working at high magnifications with a macro lens, the depth of field—the area in focus—is razor-thin. To capture a whole insect, you have to choose the appropriate aperture which will aid the final output.
- Aperture and Sharpness: To maintain the sharpness inherent in the lenses and the power of the sensor, I usually select a mid-range aperture, such as f/8 to f/11. This avoids the slight softness that can creep in at the narrowest apertures (like f/16 or f/22) due to a phenomenon called diffraction.
- The Stacking Process: To get a subject entirely sharp, I capture a series of images—often around thirty images—from the tip of the subject to the rear of the subject moving the point of focus slightly with each image. When these images are combined in the software, the result is a single image with unparalleled depth and clarity.
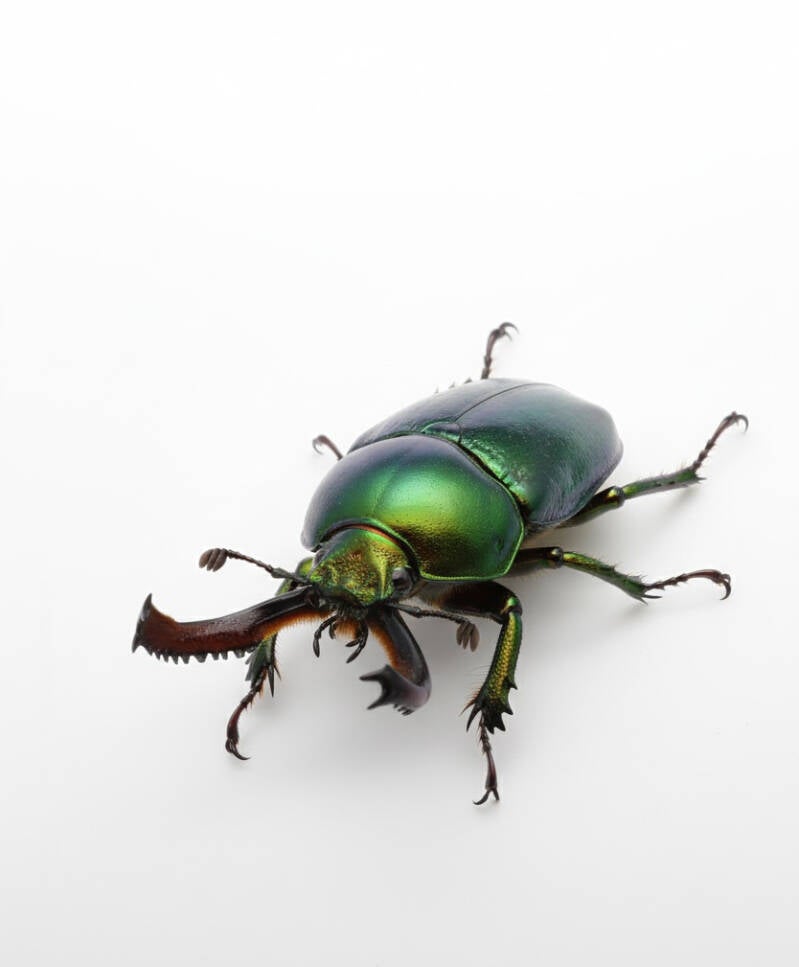
This process, especially when utilising the high resolution of a camera like the Canon 5DSR, allows for astounding magnification and detail. The sheer size of the resulting file permits massive prints that reveal worlds invisible to the naked eye.
Mastering the studio environment allows us to move beyond simply documenting natural history and into the realm of creating breathtaking fine art.
Add comment
Comments